Free Online Family Tree Maker Guide
Build a clear family tree now. Learn what to record, how to add relatives, protect living people, cite sources and choose a free family tree maker.
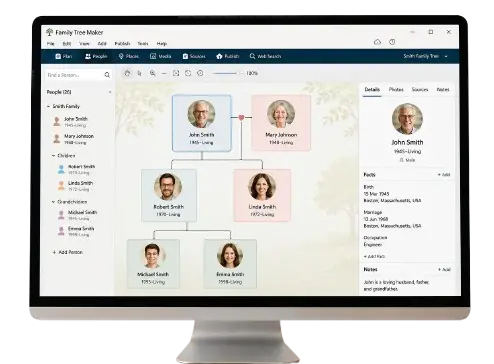
Family Tree Maker: Build and Preserve Your Family Story
A family tree transforms a collection of names into a map of relationships. It shows how parents, children, siblings and partners connect, and it provides a home for dates, places, photographs, sources and stories that might otherwise be scattered across several households.
You do not need a complete family archive to begin. Start your family tree now with yourself, add the people you know and expand one carefully checked generation at a time.
What Does a Family Tree Maker Do?
A dedicated family tree maker stores people as connected profiles rather than unrelated text boxes. When you add someone as a parent, child, sibling or partner, the tool can display that relationship throughout the tree.
Depending on the platform, features may include:
- Pedigree, descendant and fan-chart views
- Profiles for names, dates and places
- Photographs and document attachments
- Notes, biographies and source citations
- Private sharing with relatives
- Collaborative editing
- Search and filtering
- GEDCOM import and export
- Printable charts or image export
- Privacy controls for living people
- Backups and version history
Do not choose a tool only because it looks attractive in a screenshot. Think about what will happen after your tree grows to hundreds of profiles and contains years of work.
Plan the Purpose of Your Tree
The best layout depends on the goal.
An ancestor tree
An ancestor or pedigree tree begins with one person and moves backward through parents, grandparents and earlier generations. It is useful for personal ancestry research.
A descendant tree
A descendant tree begins with an older ancestor or couple and follows children and later generations. It works well for reunions and surname projects.
A household or relationship chart
A smaller chart may show one household, a blended family or the people in a photograph. It can be easier to print and share than a large research tree.
A research tree
A research tree holds detailed profiles, citations, conflicting evidence and working theories. It may be less decorative, but it is designed to support accurate genealogy.
You can maintain a detailed master tree and create smaller charts for particular purposes.
Information to Collect Before You Begin
Gather the basics for the first two or three generations:
- Full names
- Birth surnames and previous names
- Birth and death dates
- Marriage or partnership details
- Places connected with each event
- Parent-child relationships
- Photographs
- Sources or notes showing where facts came from
Do not wait for every missing date. Use “about,” “before” or “after” when the evidence supports only a range. Leave genuinely unknown information blank.
Avoid collecting unnecessary private data. A family tree does not need Social Security numbers, bank details, passwords or identification-document numbers.
How to Build a Family Tree Step by Step
1. Create your own profile
Enter your name and only the personal details appropriate for the tree’s privacy setting. You are the anchor from which immediate relationships can be added.
2. Add your parents
Record both parents separately. Use a mother’s birth surname when known, while also recording later surnames as alternate names.
3. Add siblings and children
Connect siblings through the correct parent or parents. If the software supports relationship types, use them to represent biological, adoptive, step and foster relationships accurately.
4. Add grandparents
Verify each parent-child connection before moving backward. Do not attach a similar-looking family solely because the surname and county match.
5. Add events and places
Birth, residence, marriage, military service, immigration and death events create a timeline. Standardize place names without erasing the historical jurisdiction.
6. Attach sources
Link each important claim to the record that supports it. A single source attached to the profile without stating which facts it proves can create confusion later.
7. Add photographs and stories
Identify people, dates, places and the owner of the original. Ask permission before publishing photographs of living people.
8. Review the tree
Check for impossible dates, duplicate people and relationships that do not fit. A child born before a parent or a marriage after a recorded death signals an error requiring review.
9. Create a backup
Export or back up the tree after significant work. Keep a copy on a separate device or trusted storage service.
Choosing a Free Online Family Tree Builder
“Free” can describe several different offers. A platform might allow free tree creation but limit the number of profiles, records, images or collaborators. Another tool may be completely free but store data only in the browser.
Before committing, ask:
- How many people can I add without paying?
- Can I export my tree in GEDCOM or another useful format?
- Can I download attached photographs and documents?
- Are living profiles private by default?
- Can relatives view without editing?
- Is collaboration available?
- Does the service claim rights over uploaded content?
- What happens if I stop subscribing?
- Is there a clear deletion process?
- Can I create and restore backups?
The ability to leave a platform with your data matters. Your family history should not become trapped inside one service.
What Is GEDCOM?
GEDCOM is a common format for transferring genealogy data between compatible programs and websites. It can preserve names, events, relationships, notes and some source information.
GEDCOM transfer is not always perfect. Custom fields, media files, formatting and platform-specific features may not move automatically. Before migrating:
- Create a full backup in the original program.
- Export a GEDCOM file.
- Download media separately if required.
- Import into a test tree.
- Compare profile counts, relationships and sources.
- Keep the old tree until the new one is verified.
Do not upload a GEDCOM containing living people to a public tree without reviewing privacy settings.
Add Sources Without Cluttering the Tree
A visual chart should remain readable, while detailed evidence can live inside profiles.
For each source, record:
- Source title
- Record creator or jurisdiction
- Date and place
- Volume, page or certificate number
- Repository or website
- Person’s name as recorded
- Which fact the source supports
- Date you accessed it
If the source conflicts with another record, write a short explanation rather than silently choosing one value.
Represent Modern and Complex Families Respectfully
Families include biological, adoptive, step, foster, guardian and chosen relationships. Use accurate labels and let the purpose of the tree guide what appears in a particular chart.
Good practice includes:
- Recording more than one parent type where supported
- Distinguishing legal and biological relationships when relevant
- Avoiding terms that imply an adoptive or step relationship is less meaningful
- Asking living people how they prefer relationships to be displayed
- Keeping sensitive parentage discoveries private until responsibly discussed
A research database can preserve technical detail while a reunion chart presents the relationships a family wishes to celebrate.
Protect Living People
Before sharing or publishing your tree:
- Hide full birth dates
- Remove contact details and addresses
- Review photographs of children
- Make living profiles private
- Limit editing rights
- Use a strong, unique password
- Enable multi-factor authentication if available
- Review what public search engines can index
- Obtain consent for sensitive information
Remember that relatives may have different comfort levels. A private invitation is not permission to republish their information elsewhere.
Design a Tree That Stays Readable
Large charts quickly become crowded. Improve clarity by:
- Choosing one focus person or ancestral couple
- Limiting printed charts to relevant generations
- Using consistent date and place formats
- Keeping profile notes inside the database rather than on the chart
- Using color carefully to distinguish branches
- Checking font size before printing
- Creating separate ancestor and descendant views
- Including a title, date and compiler’s name
Always preview the final output. A chart that looks clear on a computer may be unreadable on standard paper.
Common Family Tree Maker Mistakes
Growing faster than you verify
Automatic hints can add generations quickly, but every relationship still needs review.
Merging similar people
Two profiles with the same name may be different individuals. Compare spouses, dates, locations and sources.
Storing everything in one place
Maintain backups. Services close, devices fail and accounts can be lost.
Forgetting source details
A photograph or certificate without provenance becomes difficult to evaluate later.
Publishing living profiles
Check privacy settings after imports and platform changes.
Frequently Asked Questions
Can I create a family tree online for free?
Yes. Many platforms offer free creation, although limits and paid features vary. Review export and privacy options before investing significant time.
What information should I add first?
Start with names, relationships and major life events for yourself, parents and grandparents. Add sources as you go.
Which family tree format is best?
Use a pedigree chart for ancestors, a descendant chart for later generations and a detailed database for ongoing research.
Should I include living relatives?
You can include them privately, but avoid public personal details and ask permission before sharing.
Can I move my tree to another website?
Often, if the platform supports GEDCOM export. Media and custom fields may require separate transfer.
How often should I back up my tree?
Back up after major additions or corrections and keep at least one copy separate from the platform or device you normally use.
Create Your Family Tree Now
The most valuable family tree is not the largest. It is the tree your family can understand, verify and preserve.
Continue with: